Using Stripe Payment Processing for Your Online Store

There are several different payment processors you can use for your online store – Stripe, Paypal, WePay, 2Checkout, and Paymill to name a few.
In this post, we’re going to talk about Stripe.
What is Stripe?
Stripe makes it easy to start accepting credit cards directly on your site with full PCI compliance. Accept Visa, MasterCard, American Express, Discover, JCB, and Diners Club cards directly on your site. You don’t need a merchant account or gateway.
Stripe handles everything, including storing cards, subscriptions, and direct payouts to your bank account. Credit cards go directly to Stripe’s secure environment, and never hit your servers so you can avoid most PCI requirements.
![]()
Creating a Stripe Account
Creating a account on Stripe is free and really simple to do. To sign up, you’ll need to enter an email address you want associated with your account. The email address you choose is where notifications for transactions like new payments will be sent.
So, if you have an admin business email address that you’re using for other purposes such as form submissions from your online store and you’d like to keep all of this info in one place, that would be a good address for your account. (We recommend using Goolgle’s Gmail for business which comes with several useful G Suite applications for as low as $5/month.)
If you choose an address that you may need to change later, don’t worry, you can change your email address for your Stripe account.

Stripe Features
Stripe comes with a visually pleasing and fairly easy to navigate dashboard to control your account. Fully manage direct payouts, refunds, and cancellations with a few clicks. Stripe displays all your online store payments details in a simple chart

Stripe Processing Fees
So now the cost. What does Stripe charge for each transaction? Stripe offers 2 payment options 1) Pay-As-You-Go and 2) Enterprise.
1) Pay-as-you-go is perfect for getting started and running a small to medium size business.
2.9% + 30 cents per successful charge
2) Enterprise is a customized solution for high volume online stores.
Contact Stripe’s sales team for details

How to Set Up Your Stripe Account for Payment Processing
You can use your Stripe account in Test Mode without having to submit your business information or connect your bank account if you’re not ready to start processing payments just yet (skip to next section).
To ready your Stripe account for Live Mode purchases and direct payments to your bank account you’ll need to enter some information.
1) First log into your Stripe account and then find the View Test Data in the left side menu. Click on the slider and you’ll see a popup that says “please activate your account” – click on Activate Your Account.
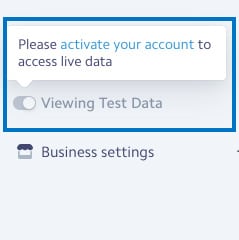
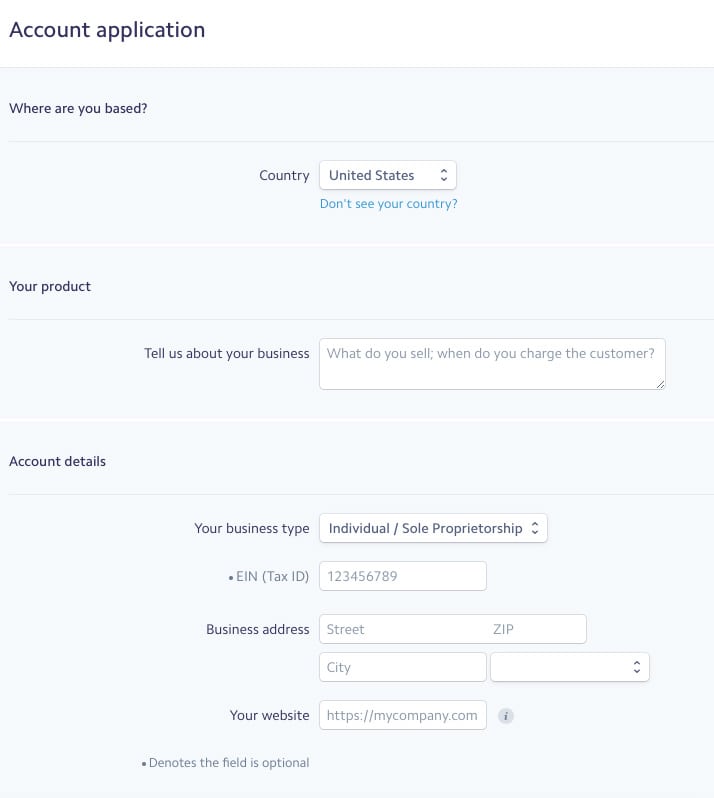
In order to fully activate your account, Stripe asks you to fill out information for your business. You’ll need to fill out all the required fields and submit. If everything is filled out correctly, setup is immediate.
Now you’ll want to add your bank account so you can receive payouts from your online store. Adding your bank account is quite simple.
In your Stripe dashboard click on Payouts, which is located in the left side menu.

Now, you’ll see a link called Settings just above the bank account section – click that. Once you’ve clicked settings there is a button on the right side that says Add Bank Account. After click that button a popup will show with fields to add your bank account information. Fill that out and your set.

How to Set Up Stripe with Your OneLaunch Website
After you’ve created a Stripe account, you can connect it to your OneLaunch website in a few easy steps.
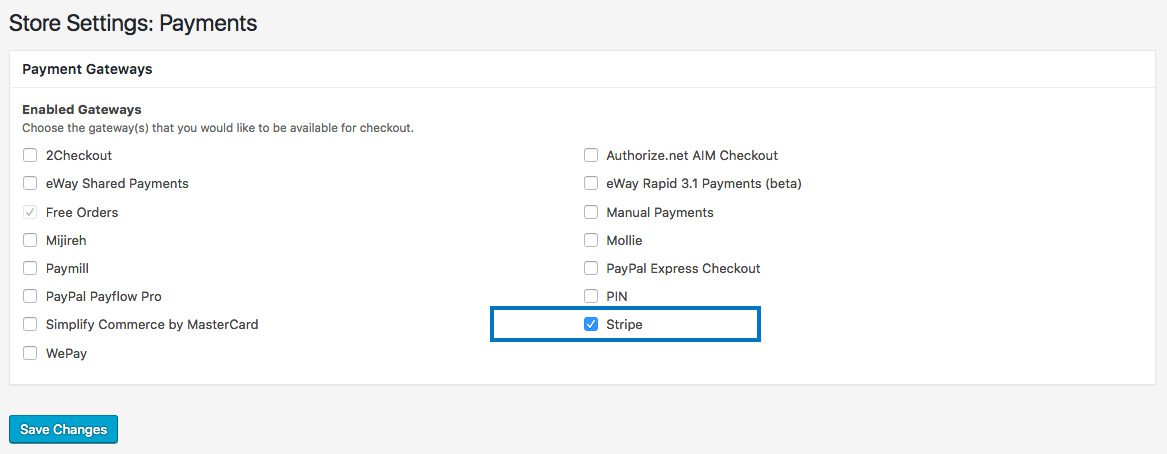
1) Once you’re logged into your OneLaunch dashboard, hover over Store Settings and click on Payments.

2) Now at the top of the page you’ll see checkboxes for all the payment gateways available. Click the Stripe checkbox. Then click the Save Changes button below.
3) Next, scroll down to the section titled Stripe Settings. You need to enter your API Credentials which are located in your Stripe account. Click Get Your API Credentials. If you’re already signed into your Stripe account you’ll land on the API Credentials page. If not, you land on the Stripe sign in page and you’ll need to click on API
link on the left side menu.

On the Stripe API page you’ll see both your Secret Key and Publishable Key. Copy each key and paste them in the correct fields on your under Stripe Settings.
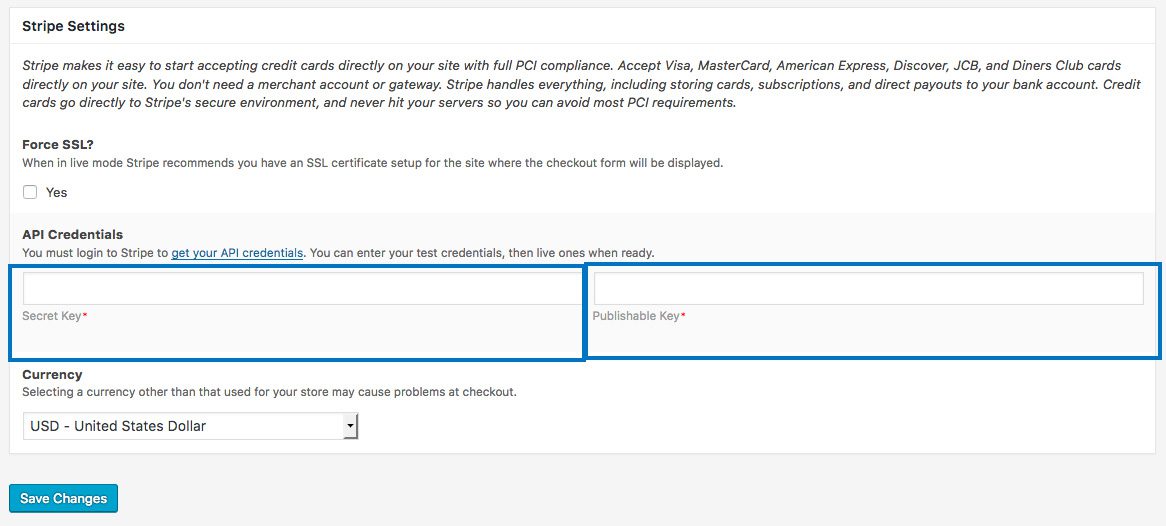
Click the Save Changes button.
Test Mode and Live Mode
Now that you have both API Keys saved in your Stripe settings, you can choose if you want to test out your transactions on your site before allowing for live transactions.
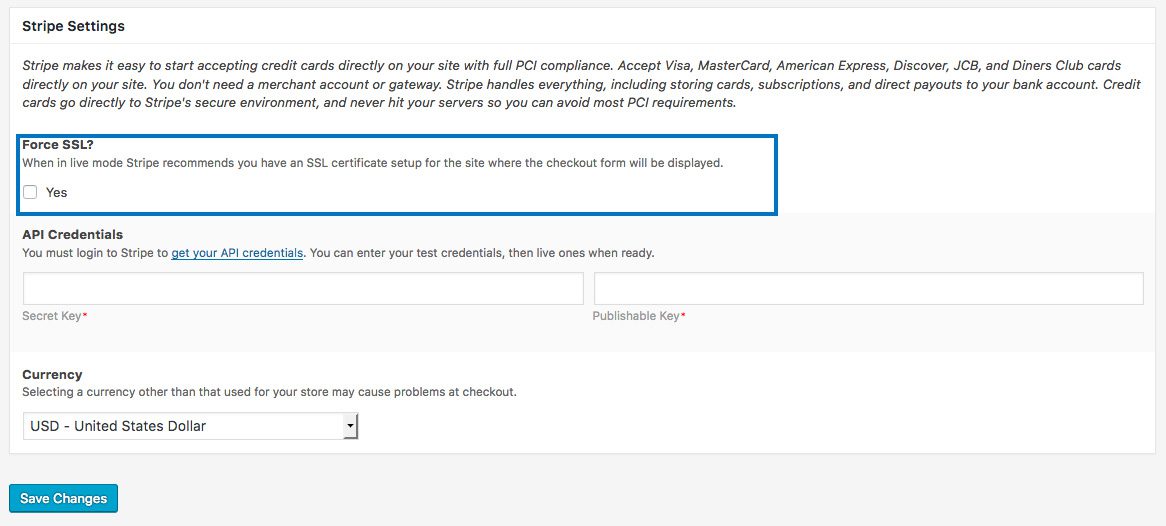
To use Test Mode do nothing. Test mode is the default setting. This means the Force SSL needs to be unchecked When checking out you can use any of these test card numbers. Choose an expiration date that’s in the future and any 3 digits for the security code.
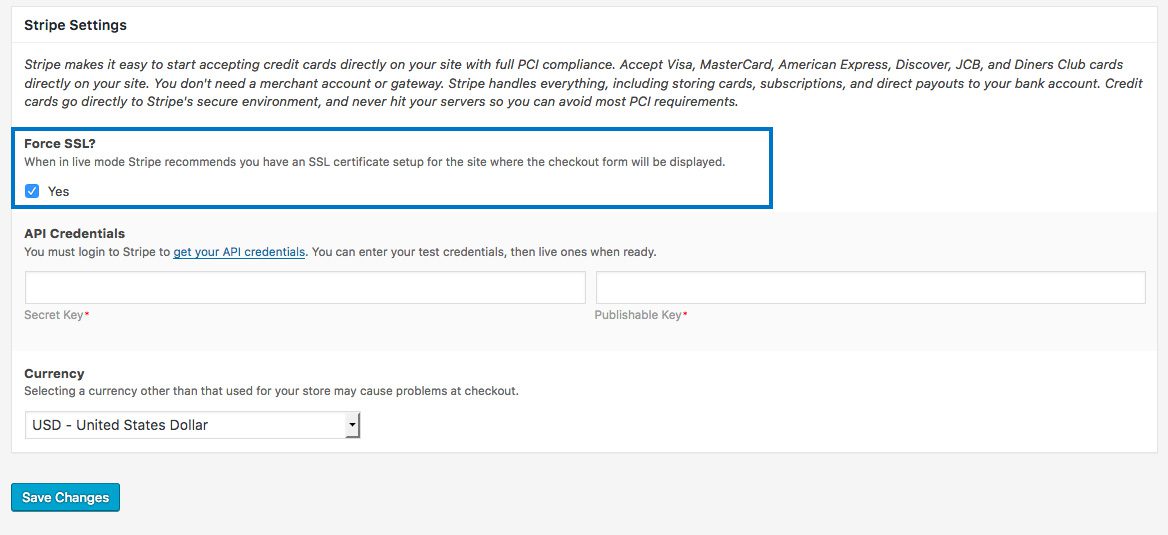
To put Stripe into Live Mode, meaning customers will be able to make purchases on your site, check the Force SSL checkbox. Then click Save Changes.
Now your online store is ready to process purchases securely and easily!
Get Started with your online business using the OneLaunch ecommerce theme, Threads. Try it free for 7 days!
